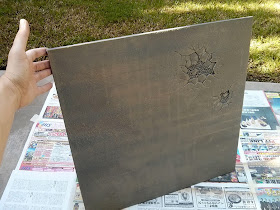
I was going to do a simple WIP, but realized I took enough photos to make a tutorial. Step by step instructions after the jump.
Terrain is important. What you play on is often overlooked, and great looking models end up battling on a bare kitchen table with books for mountains. When you have a project like this, it's important to tackle it properly.
I first washed the tiles with warm, soapy water. Large pieces like this are often prepared withe a lubricant, in order for the parts to be removed from the molding machines more easily. Unless washed off, the release agent can cause serious problems with your paint.
Next, I prepared an area outdoors, making sure I had plenty of coverage for overspray. (it is imperative to avoid the wrath of the spouse.) IMPORTANT: unless you live in the southwest, like me, now is NOT the time of year to be doing this. Cold weather and spray paint DO NOT mix. You need a median temperature of at least 65 degrees for the paint to function properly.
I base coated the tiles using aerosol paint. I used Krylon Fusion plastic paint in both khaki and primer grey. This is specially formulated to adhere to plastics. I did NOT prime the boards first, but simply applied the khaki directly.
Notice that the first coat does not cover the surface completely. It is important to apply several light coats instead of one heavy coat. Spraying too heavily, or too closely will only cover the details in the sculpt and make your board look terrible.
Once the second and third coats are applied, we have a smooth, even surface. Be sure to rotate the board 90 degrees between each coat. This causes the paint to fall in a cris-cross pattern, leading to better coverage. That Krylon khaki is a great color. Perfect for doing a desert board.
Once the khaki was dry (usually 20 minutes) I applied the grey paint to the rocky areas of the boards. No need to be tidy here, a little overspray is OK. These are just the base colors, and we'll layer acrylics on top later.
It's important to line up all your hills, and apply a final coat of grey to the rocky areas, to make sure that your transitions between panels match! Placing two hills together and having the grey areas be misaligned would really ruin the effect.
Once we have our base coat applied, and have let the boards sit overnight, we can begin applying our acrylic colors. I used cheap art store paint for this. We're talking about 24 square feet of surface area here. Those little GW pots aren't going to cut it! Trust me, the art store acrylic will do the job.
You can see in these images that the paint is very watery. When it hits the boards in different values, it begins to swirl and mix, creating natural flows that look like soil blending together. Trying to deliberately paint this effect would take hours, but if you just use plenty of water, and have faith in the happy accidents that occur, the results will be astounding.
While painting, if the colors are pooling in areas I don't want them to, I dab the surface with a paper towel. This creates additional shapes and patterns that look natural, as the water and paint re-flow over the surface.
Once the board has dried overnight (with an occasional check before bed) it looks like the image below. You can see the paint has settled in amazingly intricate patterns that mimic the way water carries soil in real life.
At this stage, the boards are a little dark, and a little too red. (should've used more yellow in my mix) But, that's OK- in part two, we'll cover dry brushing and detailing that will even everything out. And, we'll discuss how to do the rocky sections of the board.
-trip


Nice! I'm looking forward to playing on a new board
ReplyDeleteWhere can I find the next part? I'm keen to see end result!
ReplyDeleteI'll be working on the boards again this weekend, and will post the wrap up this month. :)
ReplyDeleteThis is nice! I've linked your post in our article: Citadel Realm of Battle Gameboard miniature scenery set from Games Workshop
ReplyDelete