

My new Salamander army needed an appropriate flame-tortured environment to bring them to life. Check out the step-by-step on how I did these bases.
I was really excited to get to basing these minis- it really is one of my favorite parts of the hobby. You get to be sloppy and creative and it's just kind of a low-pressure zen exercise. I wanted my Salamanders to look like they'd been burning the place to shit, turning everything into a dusty burned out wasteland. Here's how I went about it.
First (and I missed this step on my first squad like a moron) paint the bases a dark brown. I used Rhinox hide. It's not too important what color it is, just that it's a natural tone and it's darker than the surface you eventually want. Once that's dry, slather it all with PVA glue. This serves two functions- 1. holding down your first cork pieces (can also use some super glue if you prefer and then do the PVA everywhere else), and 2. it helps the paint crack when we get to that step.


Next, break up some cork into interesting rock formations and arrange them in the wet glue. I also grabbed a few sticks from my yard to be broken, burned branches and placed a couple of scattered random metal machinery bits from my bits box to make for a more interesting battlefield littered with combat debris.

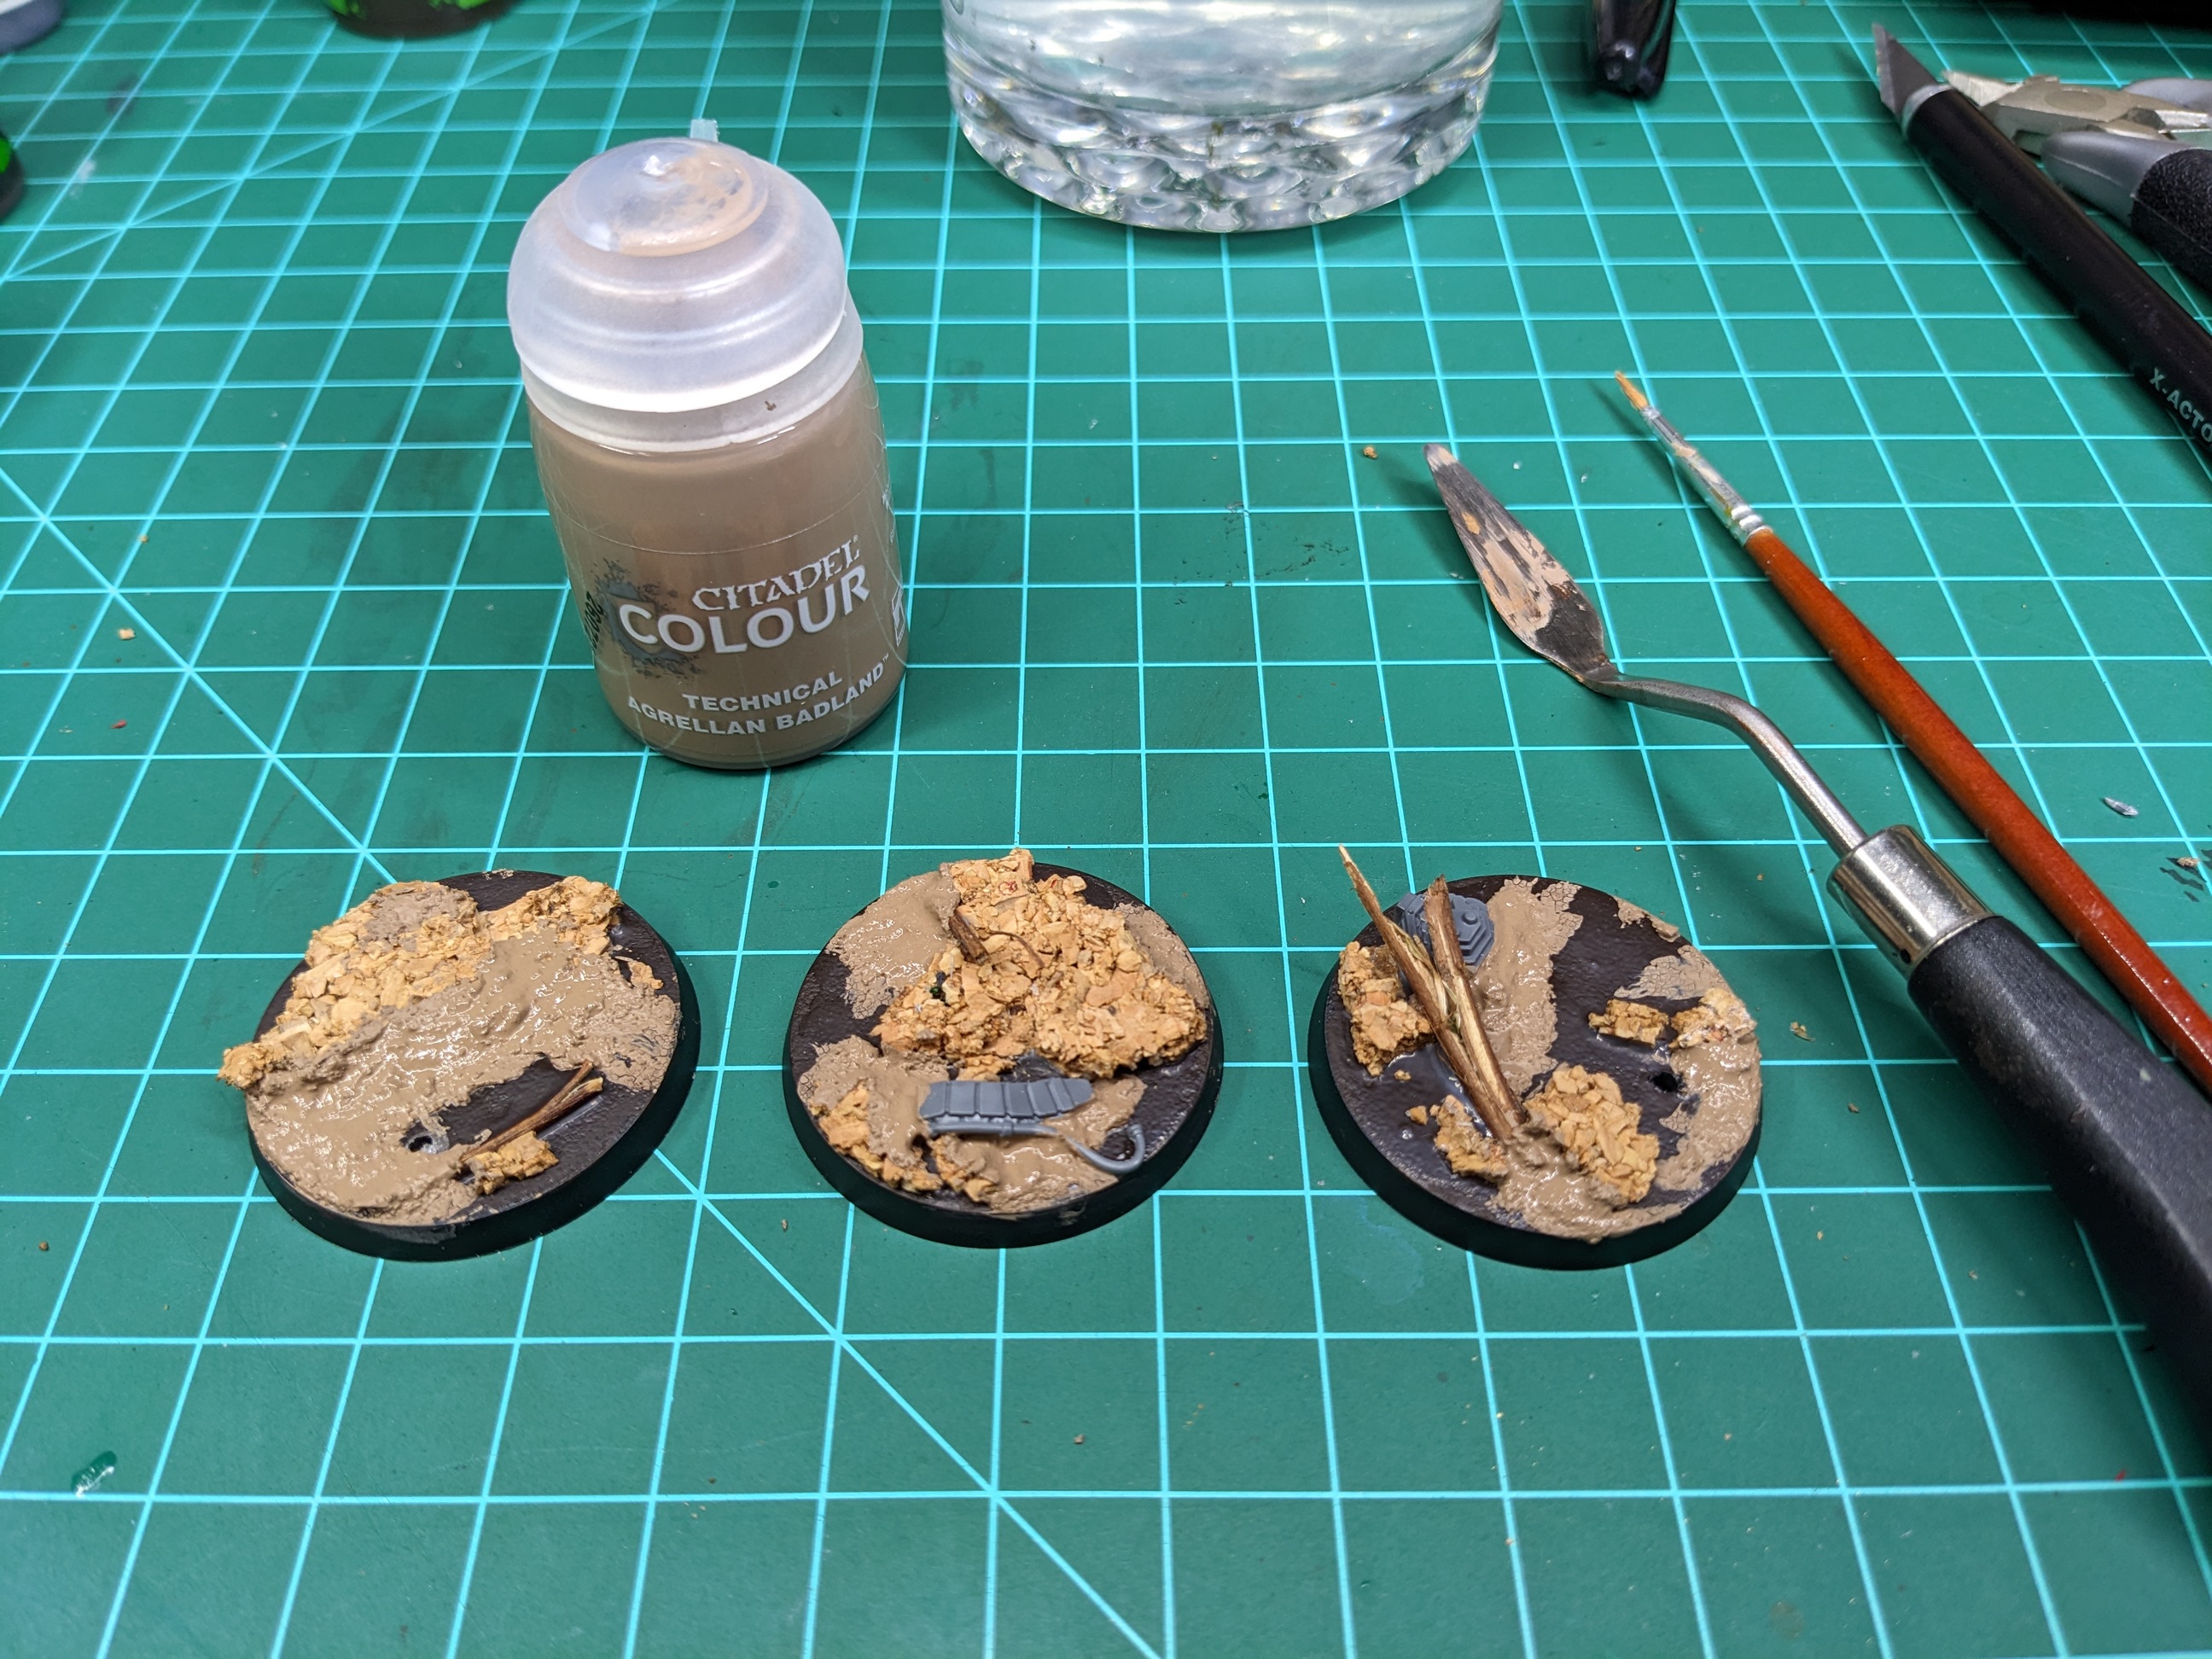
The next step is to start with your Technical Paints. I used Agrellan Badlands to blend the rocks into the base area and then Agrellan Earth to cover the rest of the base, including a thin wash-like layer over the rocks to bring the colors even. The Technical paints will crack more the thicker you put them on, so I was pretty liberal with the Earth paint over the flat areas on my base.

Next is a quick dry brush of Tyrant Skull. You can be pretty sloppy with it- you're just trying to bring up detail. It'll look to bright at this point, but we'll tone it down in a second with a wash of Agrax Earthshade. That also helps to further blend all the colors together a bit if there's too much variation.


Now we'll pick out a few of the details with some clearly-not-natural tones for some additional visual interest. I was going for a bit of contrast, but not so much that it distracts from the mini that will be on top. It's a little tough to see here, but the base on the right has a copper bit under the end of the split log. I also take a minute here to pick out a few places to increase contrast where I want certain details more noticeable. This is done with a more delicate pass of Ushabti Bone dry brushing.

Now's a good time to throw the minis on top and make sure you're liking the composition. There will be a few steps later where we can fix things we're not happy with, so we're just looking for big issues. Here I noticed that the middle guy had nothing under the front half of his foot. I then promptly forgot about it and didn't fix it until I was almost done, but this is where I should've done it to minimize re-work. Then a nice mix of tuft grass. I'm using mostly Army Painter stuff, but the tall spiky ones you'll see below are hand-made from this Woodland Scenics Field Grass. You just pinch a clump together, glob some super glue on the end and hit it with kicker to set it. Then you can trim it to whatever shape you need.


I think it's important to mix plants. An environment never has just one plant type. Unfortunately with tufts they're all kind of the same shape, so I end up giving some a haircut to make them each have a bit of a standard elevation per color. The grey Deadland color above looks totally out of place in this environment but when it becomes a burnt plant later it works fantastic.

Now burn it all down. Years ago I saw some article on getting your own basing materials for cheap and they talked about hacking open a water filter and then using the filter medium as sand. I mean, sand isn't that hard to find but I did it anyway. The stuff inside is pretty jagged which makes a pretty good gravel if you paint over it. I realized that the slightly glossy sheen to it actually worked great for charcoal. Probably because it's charcoal. I never noticed the other green stuff until I put it under the bright hobby light, but you don't see it at all under normal circumstances. I applied a bit of this to the ends of the sticks on one end so it looked like they had been reduced to charcoal. Use PVA here. It takes longer to dry but Super Glue gave me issues- went a bit cloudy. That can give a bit of an ashy effect but it's tough to control. Finally, I went over the bases with a black pigment (Vallejo Carbon Black) to make flame damage.

And the results...well I'm pretty damn happy with them. I'll look forward to showing these off when I finish my Aggressors up in the next week or so.

And there you have it. Man I love basing. Too much fun.
~Deet
~Deet
Holy hell, man! These look amazing!
ReplyDelete