
Painting Pathfinders, like most infantry, is best done in "gang" or "assembly line" style. It's much more efficient to prepare the entire squad to be painted in stages, rather than painting one model at a time to completion. This allows you to change paint colors less often, and generally maximizes the time you spend hobbying.

The models are first assembled and primed. As I've mentioned numerous times before, I never fully assemble a model before painting. Leaving a model in sub assemblies lets you reach places that would be difficult or impossible on a completed model.

I then painted the rim of the base. Overspray is not a problem here. In fact, we get free painting on our toenails. (hooves? whatever.)

Armor base color was then sprayed on the torso. I used Vallejo Gory Red. Again, a little overspray here isn't a problem so long as you don't hit the base.

I then brush painted the base color of the trousers. I used Vallejo extra opaque Dark Charcoal. I was careful around the reds of the armor, but a little slop on the feet is OK so long as you don't cover the hooves.

I finished the base colors by brush painting the feet with a mix of vallejo Ultramarine and white, and painted the extra magazines on his belt with vallejo Gunmetal and Beasty Brown. With the base colors down, we're really making progress!

I then airbrushed Vallejo Satin Varnish over the entire model, (You can use an aerosol varnish as an alternative.) and then covered it in an oil wash. Once the wash was partially dry, I wiped the model with a small cloth and turpenoid. It cleans the oil wash off the model's high surfaces, but leaves the pigment in the small details, like the plate lines on his chest.

When the wash was completely dry, I drybrushed the pants using vallejo Cold Grey and finished the details on his feet and pouches using Ultramarine and Beasty Brown with lots of white to create highlight colors for edge painting. I also added "chipping" to his armor by dabbing small amounts of Cold Grey.

I based the model using GW texture paint Armageddon Dust, and then base coated it Beasty Brown. I added small bits of torn wine cork into the texture paint to make larger rocks.
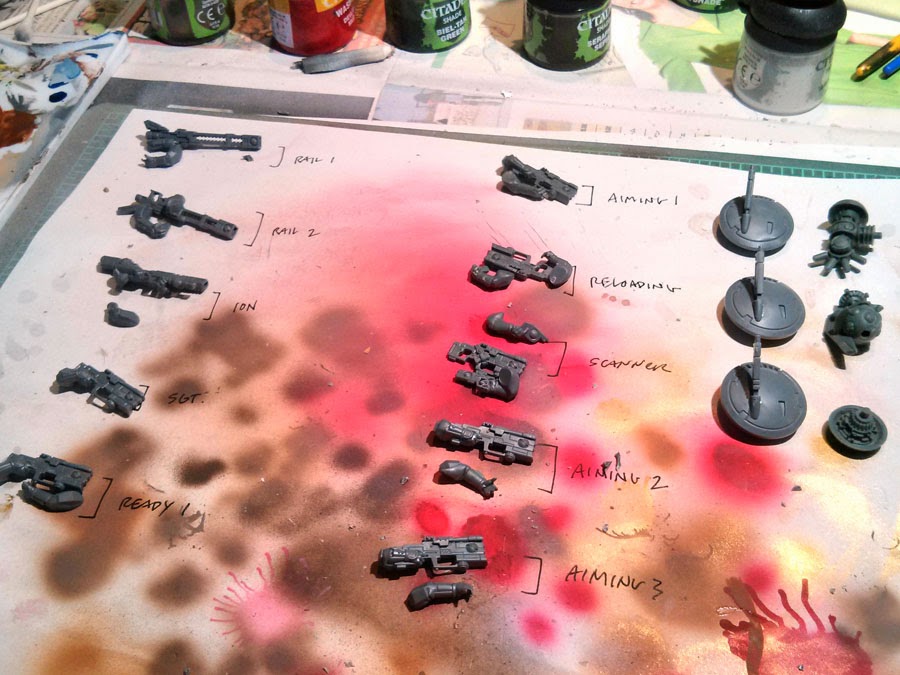
I then selected and sorted my arms. Certain pairs only work with each other, so I used this high-tech system to keep everything straight.

I used a pin vise to drill small holes on the inside facings of the shoulders, and mounted the parts to cork caps. This allows me to paint the pieces without touching them.

I primed the parts, being sure to keep the pairs matched.

I then painted the base colors to each, and sprayed them with satin varnish.

Once the satin varnish was applied, I oil washed and wiped the parts. You can see how well this technique works on the drone plate lines. With very few exceptions, I have forsaken ink washes, which require either insane precision, or the repainting of all the main surfaces of a model, for oil washes. It's simpler, faster, easier and nets better results overall.

I painted the heads separately. I opted to make my pathfinders all helmetless, to set them apart from the rest of the army, but the same suggestions apply to any head. I primed the heads white, then airbrushed white with a little vallejo Ultramarine mixed in to create a pale blue. You want to go a little light here, as the next step will make the head darker, overall.

I then wash them with GW Drakenhof Nightshade. (an ink wash exception to my rule) When the wash dried, I airbrushed the white & Ultramarine mixture from the top down, creating a natural highlight on the top of the head. I finished by making a small brush highlight on the brow, cheekbones and lower lip.
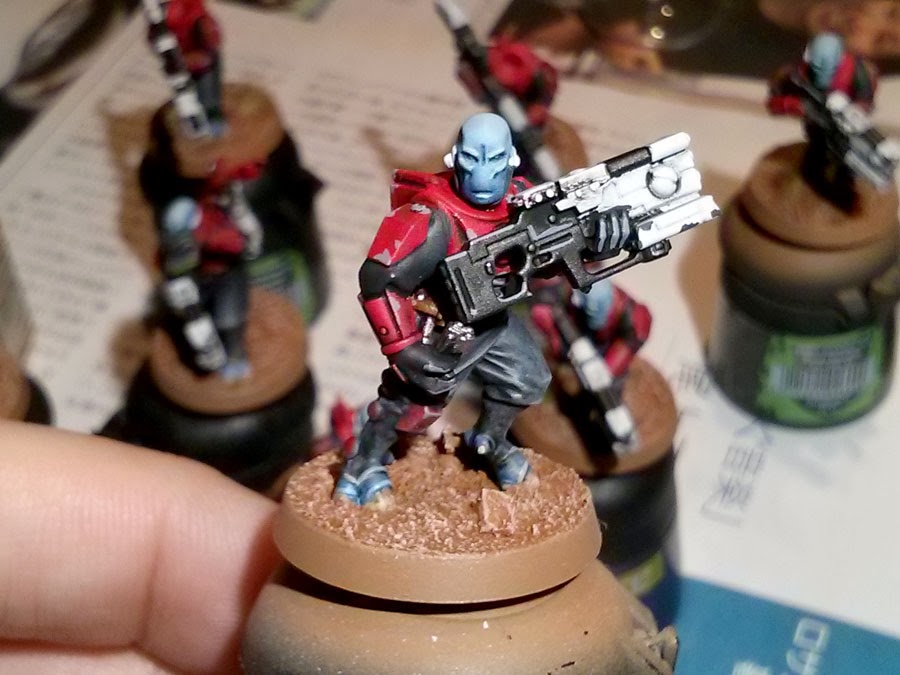
When all the parts were complete, I made the final assembly and dry brushed the texture on the base with vallejo Bleached bone. This final stage in assembly line painting is the most rewarding. After hours of work, an entire squad comes together in a matter of minutes...

...and your eagle-eyed, battle-worn scouts are prepared to take to the field of battle!
I hope this step-by-step tutorial was helpful, let us know in the comments below.
-trip
Really neat tutorial. I never tried to clean my oil wash with piece of cloth. You said that you use turpenoid. I usually thin my oil with white spirit. Do you think I could clean my model with white spirit or should I get some turpenoid?
ReplyDeleteWhite spirit and turpenoid are the same thing, so you should be all set.
ReplyDeleteI love your efficient work flows. You have a great balance of quality and efficiency.
ReplyDelete