

Today I wanted to share a technique that radically changed how I paint minis. Airbrushing has completely altered how I paint, what colors I use, and how I go about painting a model from start to finish, especially vehicles and walkers.
I've only been using an airbrush for about 2 years now. Until that point, using an airbrush was an intimidating aspect of painting minis that I was always afraid to approach - kinda like wanting to drive your father's exotic sports car that no one else is allowed to touch. I was just always afraid of not knowing what I was doing, ending up botching a bunch of minis, flushing cash down the crapper.
A good friend of mine gave me his compressor and a Badger airbrush as a birthday gift and it sat in my closet for about half a year until the 5th edition Grey Knights codex came out. This is significant because I wanted to learn how to paint the cool NMM Nemesis Force Weapons that are featured in the codex. I was able to do it once by hand, and it was almost wholly accidental. I was never able to reproduce it again because I had no idea how to retrace my steps since I had done it purely by fumbling around with various colors.
So I Google'd "how to paint grey knights weapons" and came across this amazing video, many here are probably already familiar with.
The creator of the video has a rather charming Polish accent that just adds to the awesomeness of his tutorials. Consequently, this opened up a huge new avenue of painting for me. Airbrushing instantly made sense and I've been a fan ever since.
So I thought I would pass on some of that excitement with a very easy tutorial on getting really cool shading effects on vehicles; especially Space Marine vehicles due to their blocky shape.
Here you will see two different approaches but in the end they yield the same results.
Approach 1:
- Prime the vehicle wholly in black. I tend to prefer GW's Chaos Black spray because it dries super quick or Rustoleum 2X black primer. I've become a huuuuuuuge fan of the Rustoleum primers, not just because the coating is superior but at $3.87 a can in California, that's nearly 1/4 the price of a GW can of Chaos Black.
 |
| Stealth mode activate |
- Using a super light grey paint - I will use Vallejo's Stonewall Grey - carefully airbrush the raised or flat areas of the vehicle and leave the recesses, angles, or other depressed features as black. Airbrushing it will create a natural forming blend due to the spray pattern of the airbrush.
 |
| If you end up overspraying and mottling out the shaded areas, just use black paint in the airbrush and spray the recesses only. |
- With watered down Red (I tend to use the old GW Blood Red) do a thin coat of airbrushed paint over the entire model. The red paint is translucent enough to leave the shadow areas still visible, thus creating a faux shaded appearance.
 |
| I apologize that it's not the best photo to illustrate the technique but you can see it visible around the missile pod. |
Approach 2
This method is very similar to the first.- Prime the model black
- Airbrush the entire model in light grey (again, I used Vallejo Stonewall Grey).

- Using Vallejo Air Black, I airbrushed in the recessed shade.
 |
| If you feel the shaded areas are not dark enough, feel free to go over it again with black. |
- Once again, using step 3 from the previous method, a watered down coating of red.
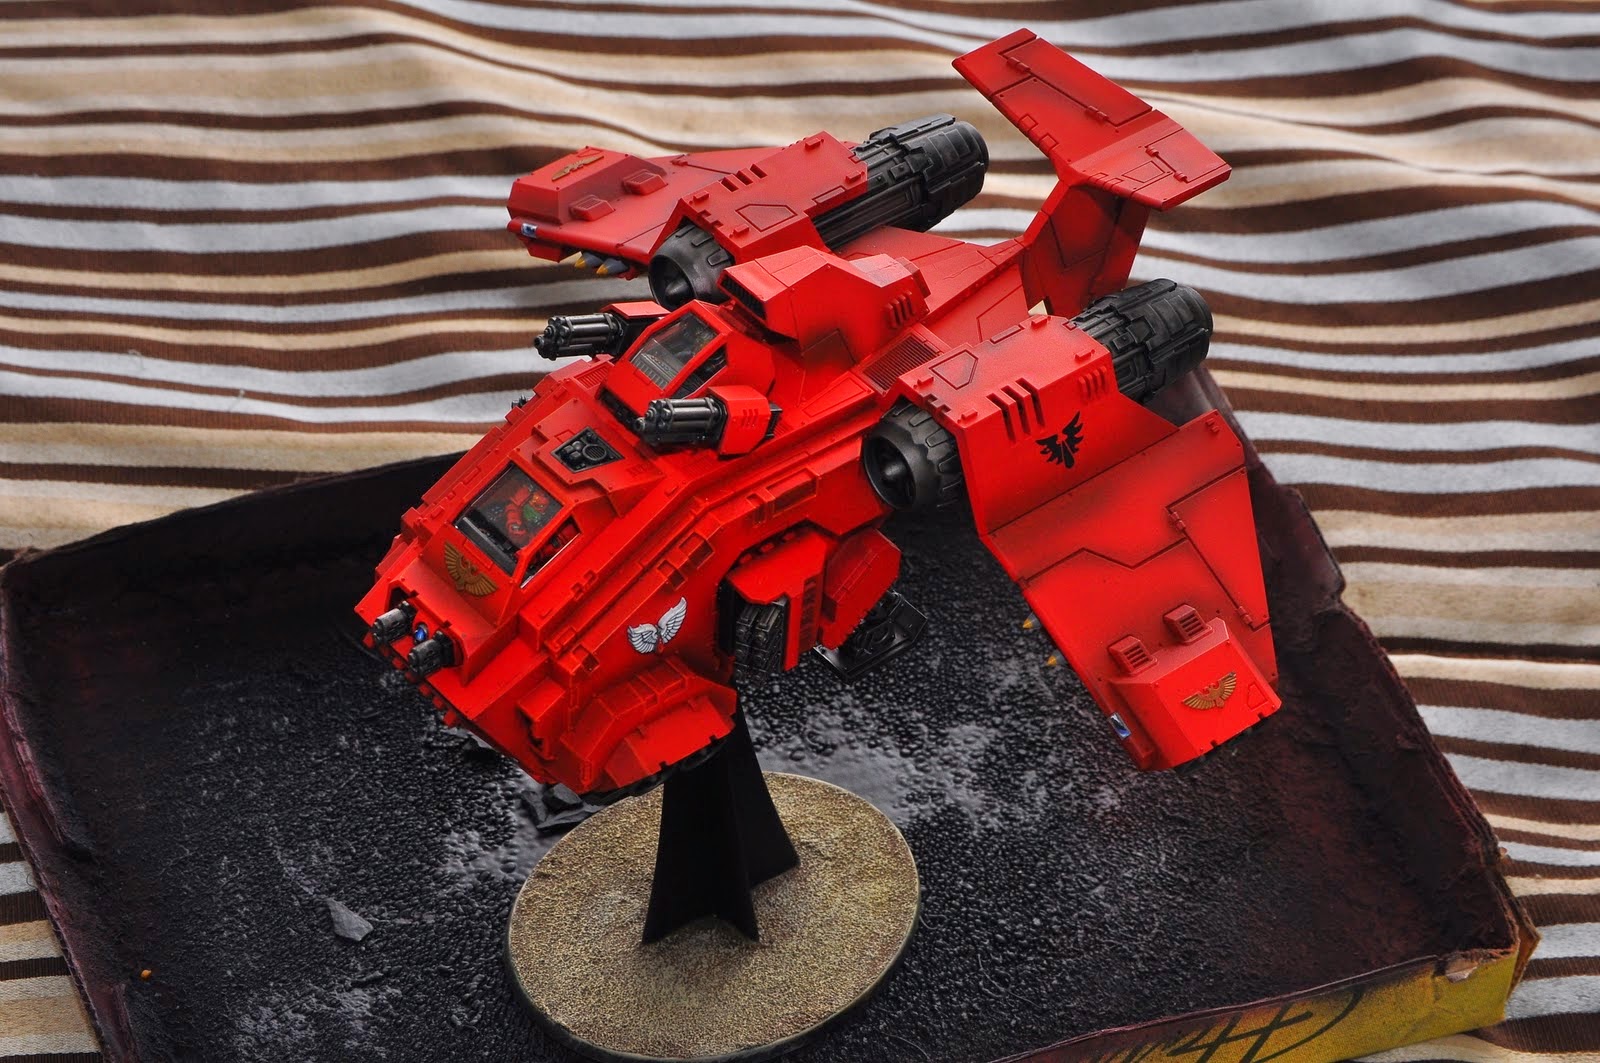 |
| You can see the shading rather prominently in the wings. |
The pre-shading method creates a really cool effect without having to apply any kind of crazy blending, layering, shading techniques by hand. From there, just paint the extra details in and you get a pretty cool looking vehicle.
 |
| This method will work if a model has a lot of flat segments of armor like this Baneblade chassis converted into a Fellblade. |

 |
| It works on a variety of different models, especially if they have large flat-ish surfaces. |
 |
| Applied to the armor to give it more carapace-like appearance. |

 |
| I drilled a magnet into the grapple of the Stormraven and Furioso Dreadnought so I could mount him there. |
 |
| Cockpit view |
Some additional pointers:
Airbrush paints
I rarely ever use paints that are designed specifically for airbrushing. I like using Citadel colors or colors that are analogs of Citadel like the Vallejo Game Color line or Army Painter.Therefore, I will usually create my own airbrush paints with a mixture that seems to work rather ideally for my use.
2 parts paint, 1 part isopropyl alcohol (rubbing alcohol), 1 part Liquitex Airbrush Medium
When it comes to airbrushing metallic paints, I used just Army Painter Gunmetal and Isopropyl Alcohol 50/50. Not only does the paint dry faster due to the alochol's evaporation, but I've found that the coat goes on smoother.
Keep in mind that other colors may be more opaque or translucent so the amount of solvent needed to thin it will probably vary. I like using the old GW Blood Red because I find it more translucent than the current Evil Sunz Scarlet. So any time I find any Blood Red, I tend to hoarde them since I go through a LOT of red.
Spraying paints
Make sure when you're airbrushing that you do so in a well-ventilated area. Although many of the paints designed for miniatures are non-toxic, you ARE spraying a lot of particulates around the room. After a 7-hour session of spraying red, I was blowing red out of my nose for a couple hours after.Don't saturate spray the model. Spray it in light layers, even if you have to wait until the previous layer dries before applying the next. Because airbrush paints are thinner, if you spray too much at a time, it will start to run in rivulets. This can really interrupt the smoothness of the coat you're applying.
Do not be afraid to experiment. Much of what I learned was simply by trying different things and seeing if it worked. Some people swear by adding Windex glass cleaner to their paints to airbrush it. Some like to use Tamiya X-20 though it's something you'll want to wear a workshop mask with. Look up different airbrushing videos.
Also
Finally, the Forge World Imperial Armor Masterclass books show a lot of airbrushing techniques they use. These books are a bit different than the Games Workshop 'Eavy Metal guides because the Forge World books use brand names other than Citadel.Feel free to ask any questions about this method and I'd be more than happy to explain further if I failed to clearly explain anything.
Having just taking a class with misterjustin...he showed us the exact reason why you should avoid airbrush ready paints. Utter lack of consistency. He opened a brand new set of airbrush paints, and more then 50% were unusable out of the box.
ReplyDeleteAt least when you mix your own paints, you always know you are getting the same amount of pigment, water, and alcohol (or whatever blend you use).
On airbrushing in a well ventilated area....you should also be wearing an organic respirator. Non toxic or not, you don't want those particulates in your lungs. Respirators are cheap, comfy to wear, and provide your lungs and nose welcome relief when spraying for a long time.
On to happier notes. This is a lovely article on preshading. Thanks so much for doing it!
Hmm, I may have to try out some different metallics for my next round. I've been perfectly happy with the consistency of the Vallejo Air metallics when coming out of the brush, but don't always get the smoothest transitions with them. I'll have to try a little alcohol in them, or maybe just go to regular paint.
ReplyDeleteMostly unrelated: I have to say, I vastly prefer the dropper bottles like Vallejo and Reaper make to GW's pots. If for nothing other than airbrushing it'd be worth it, but I find I tend to waste a lot less paint on a palate too. And those damn GW pots never stay open...
I've never been a fan of Vallejo metallics. I prefer either Citadel or Army Painter, especially when it comes to gunmetal because the metallic flakes are so much more fine. The Vallejo gunmetal seems like the flakes are a bit larger and it has a bit more blue to it than I'd like.
DeleteIf I were to choose a favorite metallic, hands down, is Army Painter. I really like how...fluid...their metallics are. They're not very viscous at all and they mix with isopropyl really well. When mixing metallics with isopropyl alcohol, it does slightly mattify the coat a pinch, but because of how quickly it evaporates, you get this utterly amazing sheen. I'll try to post a pic of some Grey Knights or something when I basecoat some next time.
Using an airbrush will cause you to burn through a LOT more paint than using a paintbrush. I don't know how many bottles of gunmetal and Blood Red I've gone through.
It also doesn't save that much time.
You save a lot of headache and energy while basecoating, but you spend a frustrating amount of time keeping the nozzle clean. However, I am rather OCD about keeping my airbrush spotless.
The tradeoff is that you can basecoat a LOT of models quickly and more importantly, the coat is very consistent.
Hmm. Yes, I too have noticed that some of the Vallejo metallics are a little large grained. I'll have to try the Army Painter ones.
DeleteThe metallics are particularly bad with airbrush clogging. I usually have to disassemble and give mine a soak in thinner after a session of metallic spraying.
Another great post! Funny that the video you linked is the exact video I saw that got me started on vehicle preshading
ReplyDelete