Here's part 2 of my jungle base tutorial where we'll get in to the painting process.
If you didn't catch it the other day, here's part 1 that covers sculpting vines and leaves.
Now for painting. I start with a base coat of Rhinox Hide.
Next is a dry brush of all my tiles in Zamesi Desert. That helps warm up what will eventually be something like sandstone tiles. This is on the tiles plus all gravel around the base.
Follow that up with more dry brush in Ushabti Bone and Screaming Skull, making sure to leave some of the previous color showing and moving toward a light source (lower left in this case) as you progress through.
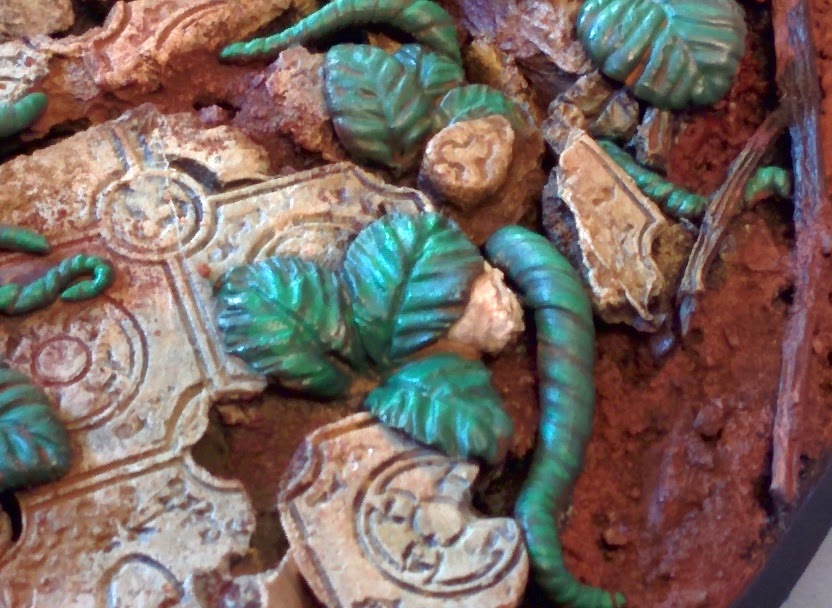
Now I go back and base all my vines and leaves in Waggah Flesh. At this point I decided to do the first step of my pigments so they wouldn't muddy up the highlights on the vines and leaves. I also dabbed a tiny bit of green in to the cracks and in the shady spots on the statue. You'll see that in later pics.
I mixed up a batch of mud from the Secret Weapon demo, using their mix of Clay, Terracotta, and Dark Earth. It was lighter than I wanted so I went back and added some Violet.
Some Realistic Water and some actual water, plus a little bit of fine sand from my basing kit mixed in to the pigment mix gives a pretty nice chunky mud you can apply with your brush. I slathered that around the outside and between the tiles. You don't have to be too careful with it, but avoid hitting the higher spots on the tiles that should stay out of the mud.
While I waited for that to dry I did the highlight on the greens, which is a mix of Waggah and a lighter green (in my case vallejo sick green). You'll highlight the whole vine here along the edges of the twists to bring out the edges. The leaves get a blotchy dab coming out from the center line, but leaving the outer edges dark.
Now I go with pure sick green and highlight just the very end of the vines to simulate that lighter new-growth look. The leaves get a tighter blotchy dab along the center line, followed with a final pass with a little bit of yellow mixed in.

Now to highlight the mud. I mixed up another small batch of mud, but this time using only Clay pigment. This went on to only the highest spots to show where the mud had "dried out" a bit. You can also see the beginnings of some of the really wet areas which is just Realistic Water dropped right on top and brushed down in to the cracks. Pushing that contrast. I also painted a couple of old discarded skulls (where's the rest of the bodies in this world? Why is it always just skulls?). Those were the standard Ushabti Bone, Screaming Skull, Skull White. Horns on the demon were a hand mixed dark grey highlighted with a lighter one. The little bits of twig got a little bit of Mournfang dry brushed on them just to make them stand out a little from the dirt below.

Now for a final little touch, I added a bit of Brown Earth Pigment. This is some unnamed Polish brand that I have no idea where I got it. I basically used it as a wash though- putting a little in to the pools of water and glazing over the tiles to make the cracks pop. You could easily do that with paint/inks. I will definitely be going back over this base a little more once the figure is done to tie the two together a bit more and we'll get in to some more washes then.
That's it! Hope you guys find that useful. If you guys see us doing anything else that you'd like some explanation on, feel free to ask. Sometimes it's hard coming up with 3 topics a week!
~Deet


another extensive and fantastic tutorial! Great work on the photos.
ReplyDeleteLooks great Deet. I always like seeing...
ReplyDelete1) combos of colors for things like stone
2) People using the secret weapon pigments...as they definitely require some skill to use!