

As requested, here's the tutorial for how I do my jungle bases for my Grey Knights. This will be a step-by-step on sculpting vines and leaves, followed by pt2 with the whole painting process.
I am by no means a greenstuff expert, so trust when I say that if I can do this, you can too. It certainly helps to have the right tools though so let's get that covered quickly.
I recommend having:
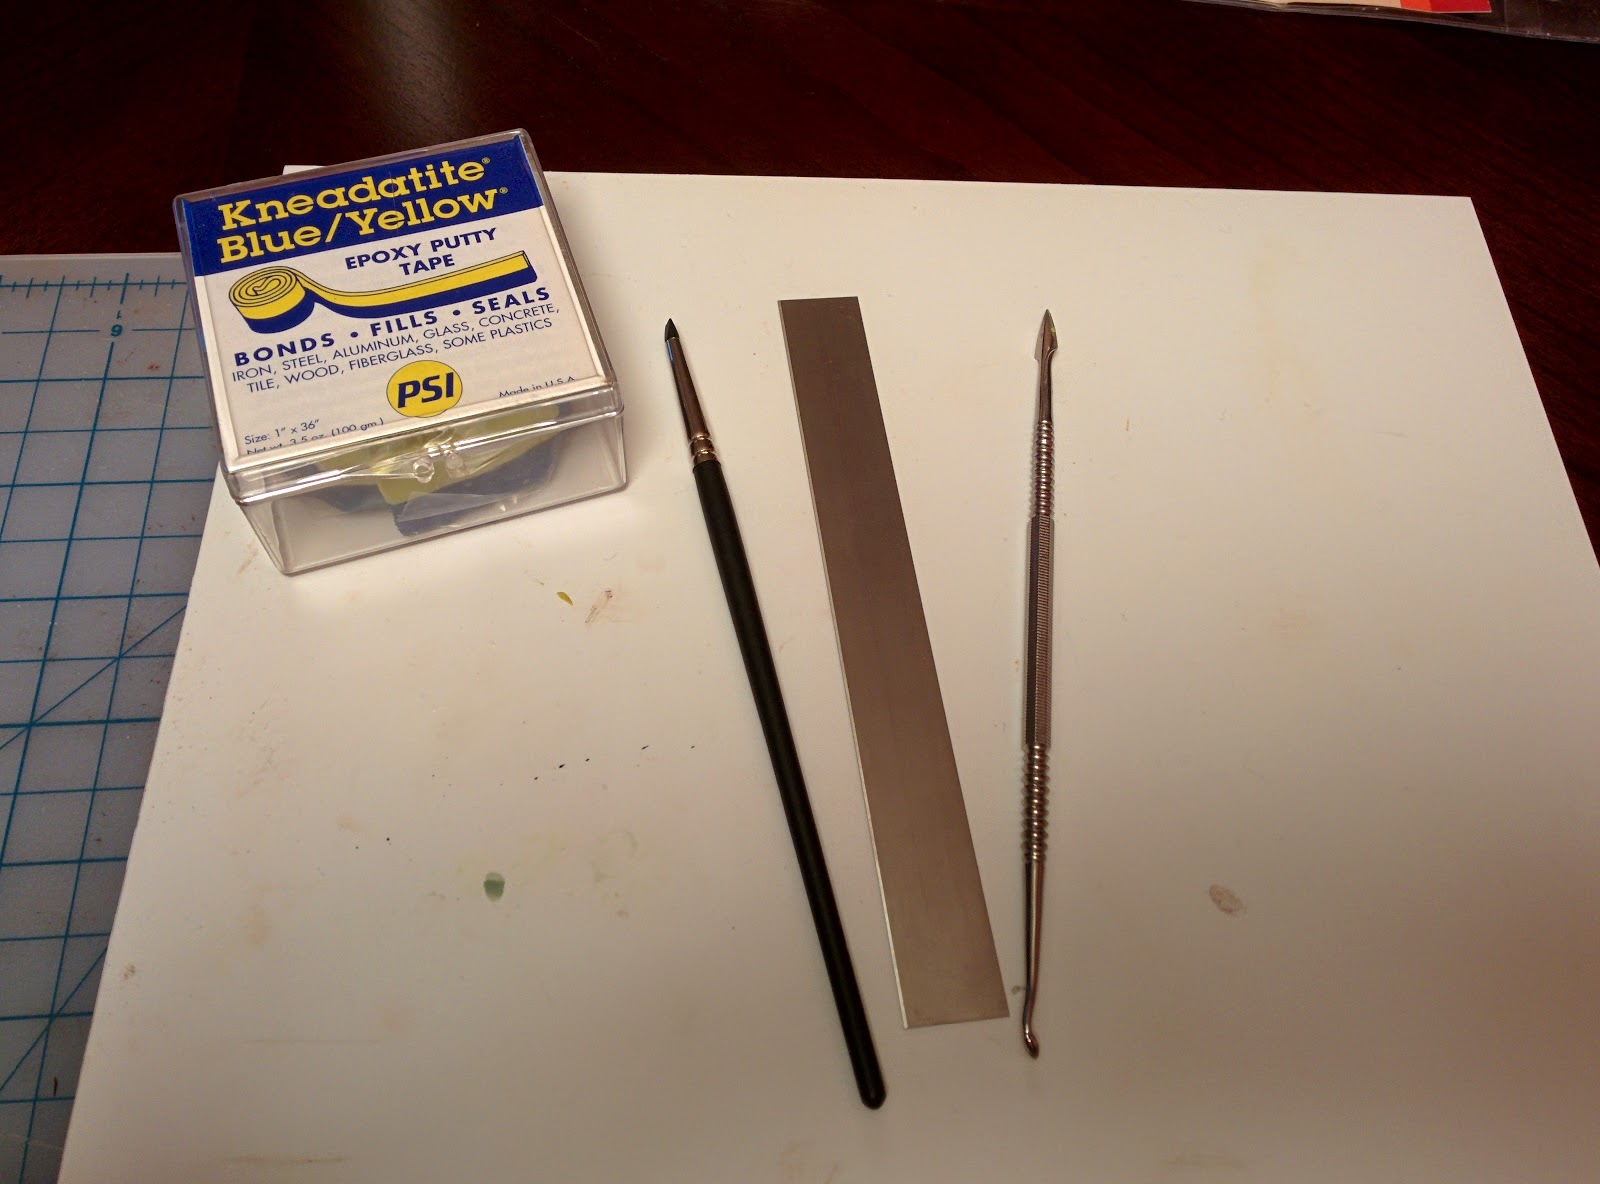 Fresh Greenstuff- don't do what I did for years and try to use ancient stuff that sculpts like petrified shit.
Sharp dental tool- eBay or your local swap meet tool guy
Smooth piece of flexible plastic to sculpt on- I have a piece of sheet styrene, but you can even use that pvc from your clamshell packages. It probably works better than my styrene
Cutting blade- I have this great one, but you could probably just use an Xacto blade out of the handle in a pinch.
Ok, that covered, let's get in to the base. My temple floor tiles are from Scibor, as is the statue head. The tiles are great and I wish they made a basing kit for this style so I could buy the tiles properly. I played around a bit with the tiles, trying to vary it up and give myself some good cracks for nature to have its way with. You could easily do the same with cork and make some nice broken concrete. Be sure to litter it up with lots of broken chips, especially along the outside. This wasn't my best layout. You should always do your base with the model close by so you can work our the composition properly. I was in the zone and not really thinking. It'll look pretty good on its own, but may be a little clunky with the Dreadknight on top.
 |
| Early stages of layout |
Now for the vines. These are super easy. I'm going to forget to repeat it, but always use water on your tools and base when working with green stuff to avoid sticking. Just assume a "put water on fingers, tools, base" going along with each step. Roll out a small symmetrical tube, then work yourself down to a small stubbed point on one end. This should be the rough shape of your final vine, just a little shorter and fatter.

Now take a smooth round tool and gently roll it down your tube to get a little bit of a smooth section on the top. We just want a flat top- don't squish it.

Now take it by the end and twist. That flat top will give you a visible harder edge as it twists. You may want to twist the small end off for a clean point. The fat end you can either bury so it's hidden, or trim off with your knife to get rid of the fingerprints. Now lay it in its final resting spot and let it cure.


The leaves are more involved but I think you'll find pretty easy. Nice thing about organic stuff is symmetry isn't essential. Start with a small ball about 1/3 smaller than your final leaf size. Flatten it down with the side of your tool and then pinch one end down to a point.


Now take your sculpting tool (I recommend the silicone for everything here until the final detail sharpening at the end) and roll the edge over, rounding and softening that edge all the way around to get rid of the corner you made when you flattened it. Note that you'll now be hopelessly stuck to the plastic base here no matter how much water you used, but that's ok. Now gently stab a line straight up the middle of your leaf. Stab, don't drag, unless you have a soft point tool. You don't want sharp edges here.


Now with the point of your leaf facing away from you, start scribing lines out from the center to the edge. Note that toward the base of the leaf the lines are closer to horizontal and lean more vertical toward the point. The opposite side of the leaf should roughly mirror the angles as you move up, but the starting points should be staggered a bit.

Now take your tool and push in at an angle, pulling the tool away and up toward the top of the leaf. That will leave you with kind of a dull saw blade cross section when you're done.

Now it's just cleanup, I switch to my sharp blade dental tool here and tighten up some of the lines, taking care to indent a little bit along each leaf vein right where it meets the center line and at the opposite end where the vein hits the outer edge. I'll also take the point of the tool and drag the base of the leaf out to create a hint of a stem. As a final touch, I sometimes gently tap the silicone tool perpendicular to the veins to give the leaf some texture.


Now take your blade and carefully slice the leaf off the plastic. Being very careful not to muck it up with fingerprints, lay it over a round tool handle to let it cure with a nice graceful curve. Done. Leaf.
Stay tuned on Friday when I'll cover the paint and pigments process.


~Deet
great tutorial, deet. nice step-by-step images and instructions
ReplyDeleteAgree really well done tutorial! Will be super useful when I start doing my own! Thanks for the xmas gift! Happy holidays!
DeleteSorry for the crappy cell phone pics. Was in a rush to get it out. Let me know if there's anything unclear.
ReplyDelete