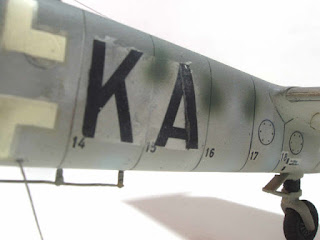
Decals (sometimes called water labels) can really add to a finished model, but applying them correctly can be tricky. Let's learn how to get a perfect finish every time!
The 3 steps are:
1. Apply a gloss coat
2. Use a decal softener
3. Apply a matte coat
Let's go over these in detail.
1. Apply a gloss coat
The first step is to make sure the decal has a flawlessly smooth surface to rest on. Decals applied to the surface of a model without a gloss finish can "silver". When the surface is rough, tiny pockets of air become trapped under the decal, preventing it from sitting directly on the surface - giving it a 'silver' or frosted appearance.
Apply a thin, smooth coat of gloss varnish to the surface. Here I've applied Games Workshop 'ard coat using an airbrush - but any brush will do. Give the varnish several hours to dry.
2. Use a decal softener.
Once the gloss coat is dry, brush on a decal solvent such as microsol, or mr. mark softer to the surface. Apply the water label as normal and let it rest in the solvent as you position it with your brush. Once it is in place, press it down gently using a paper towel to remove the water and solvent, and secure its position.
If the decal is on a curved shape, like a pauldron, apply a second coat of solvent, and gently brush the decal from the center outward, to smooth it over the surface.
3. Apply a matte coat.
When the decal is dry, cover the surface with a matte varnish. This will eliminate the shine from the gloss undercoat and the decal itself, and cause the surface to match the rest of your model. You can also use Games Workshop Lahmian medium to achieve the same effect.
And there you have it, the 3 essential steps to perfect decals every time!
-trip


I add two more steps, if it’s a curved surface, add a few small incisions on the decal to help it bend better and avoid ridges, and after dry before the matt varnish, apply another coat of gloss to seal the decal - if your matt medium is a spray it will still frost the decal film, so seal it first.
ReplyDeletegenerally, the softener applied in step 2 makes the decal so pliable that it wraps around surfaces like shoulder pauldrons without wrinkles or creasing. it almost dissolves the decal, and makes it VERY malleable.
DeleteSound advice! You forgot part of stage 2 where you dick around with the decal so much that it tears in half and sticks to itself and you have a complete tantrum and throw the model across the room and get drunk/stoned. To be fair, I haven't done that in a while
ReplyDeleteI generally pooch one in every ten decals, and have to redo it. thankfully, the sheets contain doubles and triples of most designs.
Delete